7. Start as a Service
How to automatically start UXTR on boot?
This section will describe how to run UXTR as a service on all supported platforms.
7.1. Windows
The Windows UXTR installer provides you with a shortcut for this purpose.
It’s a one-click step as depicted in the screenshot below.

UXTR as a Windows Service (c:/> services.msc)
So, enable the service first. Then, start it.
Now, UXTR will automatically start on Windows boot.
7.2. Mac OSX
Launchd is Apple’s replacement in Mac OSX for several process management utilities, most notably cron.
Almost anything you can do with cron you can do with launchd, with more flexibility.
To run UXTR on boot, use the provided uxtr.plist launchd agent file.
Although you can make things work no matter where the plist file is saved, it is best to put it in
~/Library/LaunchAgents/ (or /Library/LaunchDaemons/, /System/Library/LaunchAgents/):
$ UXTR_PLIST="~/Library/LaunchAgents/com.aleph-archives.uxtr.plist"
$ cp uxtr.plist $UXTR_PLIST

Then, load the agent:
$ launchctl load $UXTR_PLIST
$ launchctl list | grep uxtr
  85109   -       com.aleph-archives.uxtr
That’s it!
The key that controls the fact that UXTR is launched at boot time is actually the key named RunAtLoad.
So, if you don’t like this behavior, you can always set that key to false, and reload the configuration:
$ launchctl unload $UXTR_PLIST
$ launchctl load   $UXTR_PLIST

Then:
$ launchctl stop  com.aleph-archives.uxtr
$ launchctl start com.aleph-archives.uxtr
7.3. Linux
Depending on your Linux flavor, there’s more than one way to run UXTR on boot.
7.3.1. Simple rc.local
In this section, we’ll use rc.d.
$ sudo apt-get install screen python-pip

or:
$ sudo yum install screen python-pip

Then:
$ sudo pip install supervisor
$ sudo pip install superlance
Second, install Xvfb (X Virtual Framebuffer). For this, please refer to the Running Headless section in Install.
Next, let’s assume UXTR was installed under the user name batman ( i.e /home/batman/.uxtr/ ).
On Debian/Ubuntu and derivatives, append the following lines to the file /etc/rc.local to read this:
#!/bin/sh -e
#
# rc.local
#
# ...

## Xvfb
su -c "/usr/bin/screen -dmS xvfb Xvfb :99 -screen 0 1024x768x24 -ac -noreset"

## UXTR
USER="batman"
su - $USER -c "/usr/bin/screen -dmS uxtr env DISPLAY=:99 /home/$USER/.uxtr/Supervisor"

exit 0
Depending on your system, you may have to adjust the memmon command path accordingly:
$ MEMMON=`type -p memmon`
$ sed -i "s|%MEMMON%|$MEMMON|" $HOME/.uxtr/etc/supervisord.conf
You may also want to adapt the file /home/batman/.uxtr/etc/supervisord.conf to fit your
needs (auth, email address, alert thresholds, mask, etc.).
Finally, save the file and restart the system. Now, UXTR should start on boot.
At any time, you can check the UXTR status with:
$ supervisorctl status uxtr
uxtr      RUNNING      pid 10538, uptime 15:01:57
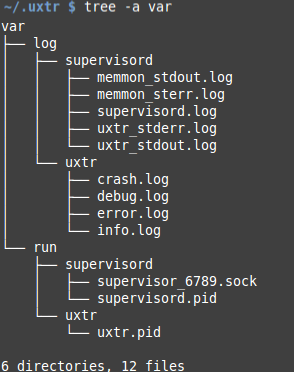
$ tree -a $HOME/.uxtr/var
Suppose now we want to restart UXTR five minutes after midnight, every day.
The following crontab entry will do the job:
5 0 * * * /path/to/supervisorctl restart uxtr
As you can see, this solution is simple, effective, and portable across different Linux flavors.
Here, we’ve assumed a user called batman. In order to use a different user, only one file has to be changed:
- /etc/rc.local (see sidebar note for Fedora 18+)